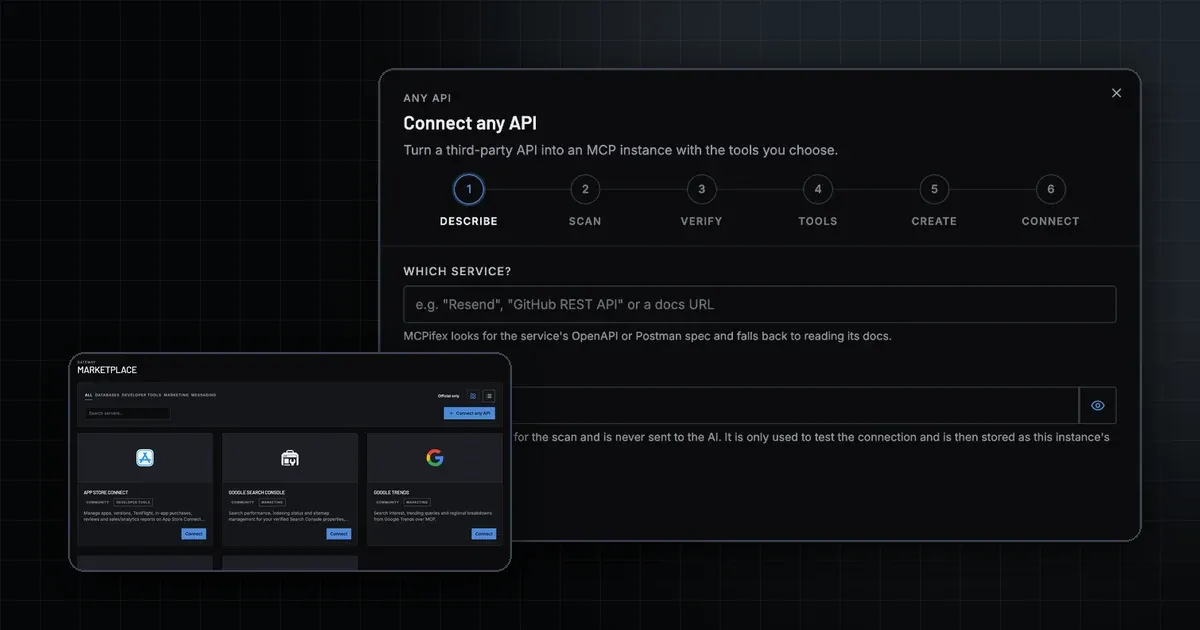
Connect any API turns a third-party REST API into a private MCPifex instance. You name the service and add your API key. MCPifex scans the API's docs, checks your key with read-only calls, and lists every endpoint as a tool. You pick the tools for your first key, save, and connect any MCP client to https://mcp.mcpifex.com/mcp. It works on every plan, including Free. For why an AI client needs MCP rather than raw API calls, see MCP vs API.
What you need
- An API that authenticates with an API key. OAuth-only APIs are not supported.
- That API key, with read access at least.
- A free instance slot on your plan. A connected API counts as one instance.
Step 1: Describe the API
- Open the Connect any API card at the top of the marketplace.
- In Which service?, type the service name (for example "Resend" or "GitHub REST API") or paste its docs URL.
- Paste your key into API key, then click Scan API.
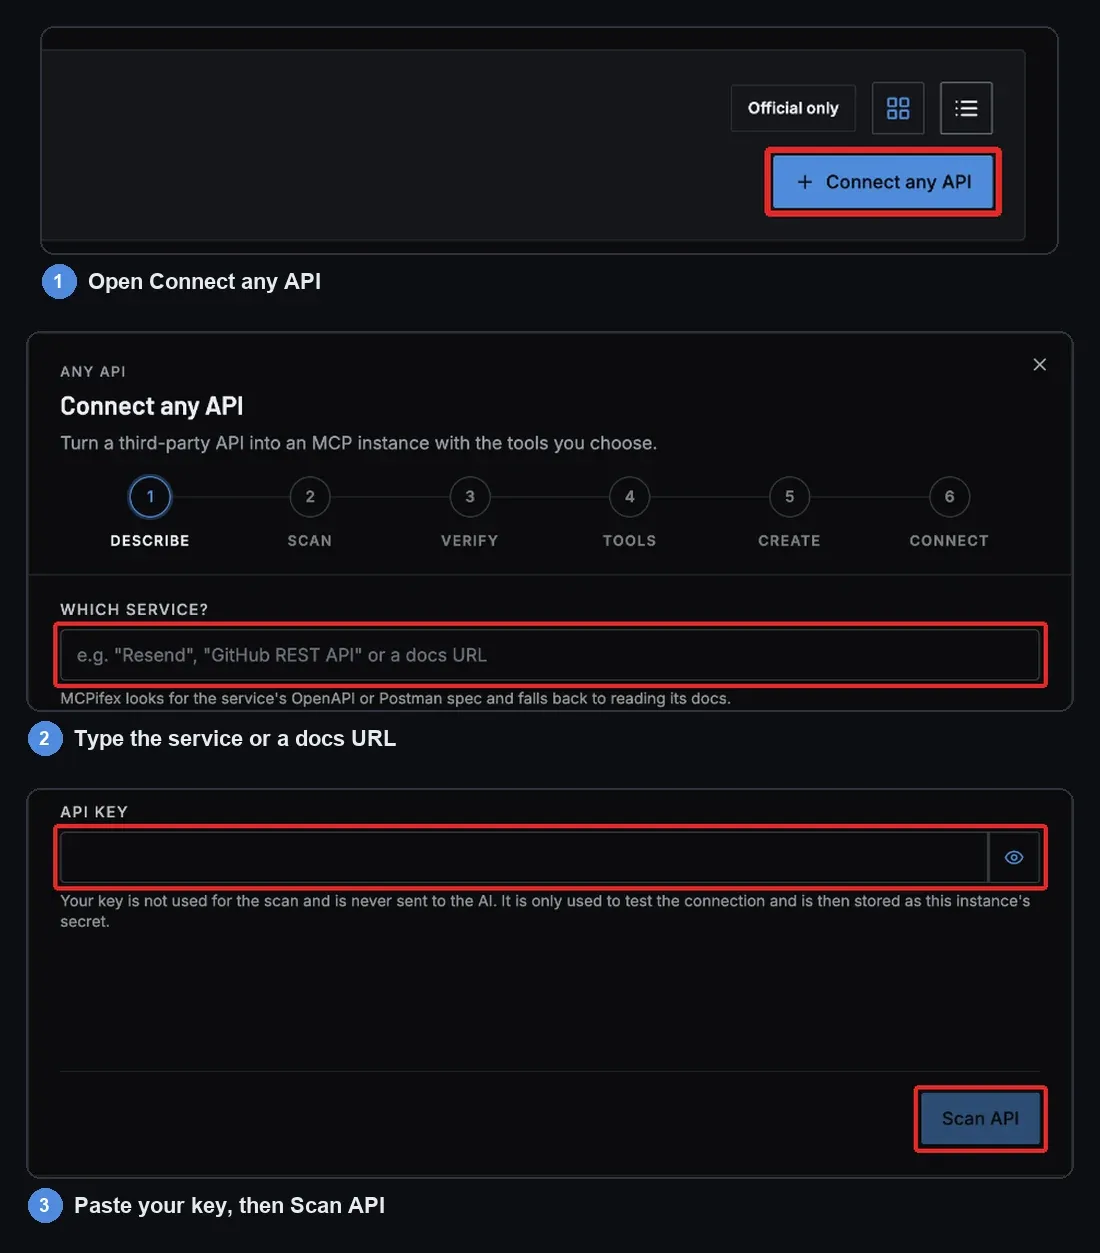
The scan never sees your key. MCPifex uses it only to test the connection, then stores it as the instance's secret.
Step 2: Scan
The scan runs in the background and shows its progress. It usually takes under a minute. You can close the window and come back.
MCPifex prefers an OpenAPI, Swagger or Postman spec and falls back to the HTML docs. From them it finds:
- the base URL of the API;
- where the key goes: a custom header, a Bearer token, a query parameter or HTTP Basic;
- extra settings, such as region, shop domain, account id or API version;
- every endpoint as a tool, marked read or write.
Step 3: Confirm the host and verify your key
MCPifex shows Where your key goes: the API host and how the key is sent. If the host is not on the domain of the docs MCPifex found, you have to tick Send my key to that host before you continue. Only do that if you know the host belongs to the service.
Extra settings appear as normal form fields. Fill in the required ones, such as your region. MCPifex then verifies the key with a few read-only calls. Nothing is changed in your account. Tools your key has no permission for are turned off.
You cannot save until the check passes. If the API has no endpoint that can be tested without parameters, you tick I understand MCPifex cannot verify this key instead. A wrong key then shows up only when a tool is called.
Step 4: Choose tools and create the instance
Under Tools for your first key, tools are grouped by resource, with search and bulk toggles. Reads start on and writes start off. Turn on only what the key needs. Click Create instance, and the last step shows your MCPifex API key. It is shown once, so copy it.
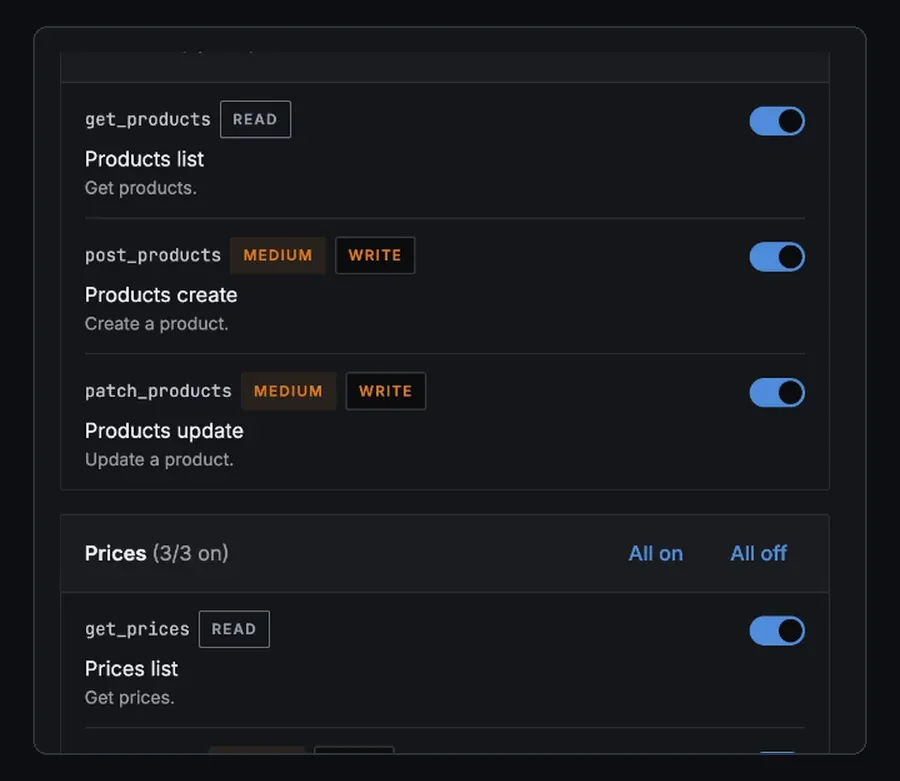
Add more keys with their own tools, as described in API keys and per-key tools. The MCP tools glossary entry explains what a client sees when it lists tools.
Rescan an API
When the API adds endpoints, open the instance's Keys tab, click Manage on any key and click Rescan API in the API tools box. A rescan updates the instance for every key. MCPifex reads the latest docs and shows a preview before you click Apply:
- tools you already set keep their on or off state for every key;
- new tools arrive off;
- removed tools are flagged.
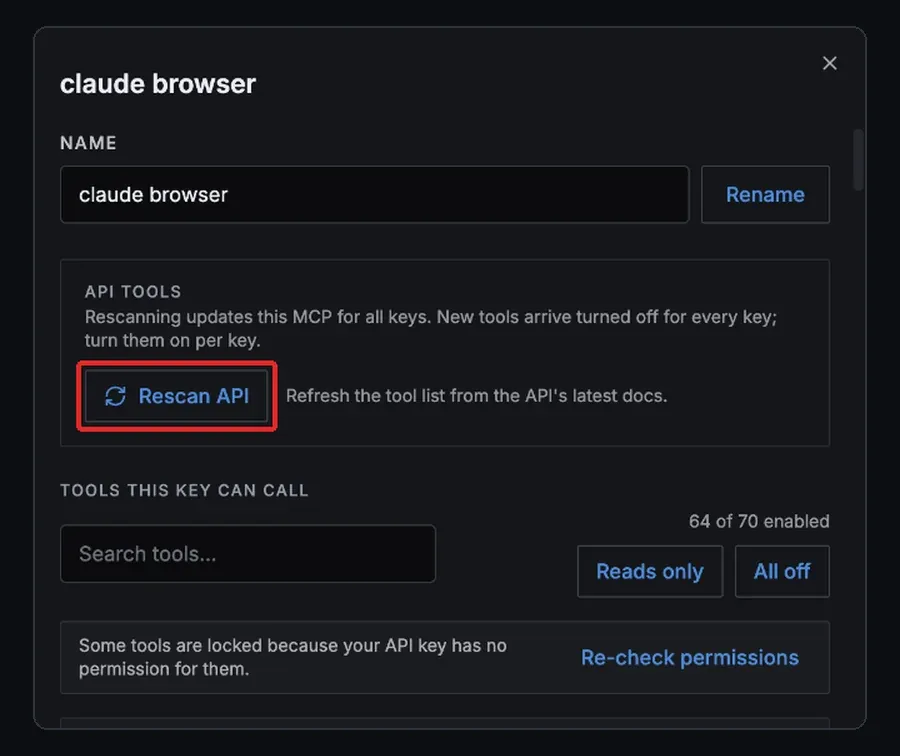
The API host and key placement stay as they were set up.
Limits
- Each connected API counts as one instance against your plan. See pricing for instance caps. Calls are unlimited.
- Response size is capped, so very large list responses are cut off.
- Not every API scans fully. Quality depends on its docs.
Troubleshooting
- The scan finds no API description. You see "Couldn't turn ... into an API description." Click Change service and paste the URL of the API reference or the spec file instead of the service name.
- The API refused this key. Check that you copied the whole key and that it is still active.
- The key works but has no permission for any read endpoint. Give the key read access in the service, then retry.
- No working endpoint, or the API server cannot be reached. The base URL or region is usually wrong. Open the fix panel, pick another value under Environment or region, or change Key goes in, then retry. The scan is kept; only the key check runs again.
- The API is rate-limiting requests. Wait a minute and retry.
- The API only offers OAuth. Connect any API cannot connect it. Check the marketplace for a hosted server for that service.
Security
Your API key is never sent to the scanner. Only the public API description is cached, never keys or account data. A generic MCPifex runtime calls the API. It can reach only the API's own host, has no local file access and never logs the key. Each client uses its own MCPifex key, limited to the tools switched on for that key. Revoke one key without touching the others. For planning keys per task, read how to control what AI agents can reach.
To build the server in code instead, see the OpenAPI to MCP guide. The Connect any API page has the overview. Tools follow the MCP tools specification.
Quick answers
No. The scan reads only the public API description. Your key is used to verify the connection and is then stored as the instance's secret.
Yes, as one instance. It works on the Free plan, which has 3 instances, and calls are unlimited on every plan.
No. Connect any API supports API-key auth only: a custom header, a Bearer token, a query parameter or HTTP Basic.
Existing tools keep their on or off state for every key. New tools arrive off, and removed tools are flagged.
Ready to connect?
Run hosted MCP servers behind one endpoint and choose exactly which tools your AI can use.